Dedicated ServersPremium Quality dedicated servers in The Netherlands
If you are looking for high-quality dedicated servers, search no more. We are here to make the difference compared to all other Dedicated Server Hosting providers. We care about what you think and like to give our customers the best experience as possible.
A Dedicated Server – how does it look like?
Posted on
Have you ever wondered how a dedicated server actually looks like? Let me show you and explain how a dedicated server gets built and what the final result looks like. A dedicated server is nothing more than several hardware parts mounted in a server casing. You have suppliers like Dell, HP and Supermicro who deliver ready-made physical servers which you can rack & stack once delivered and then sell as a dedicated server, or you have suppliers who sell the hardware parts, where Supermicro is an example from.
We mainly work with Supermicro as hardware supplier for our dedicated servers, because they have the highest price/quality. We’ve been working with Supermicro since 2007 and compared to Dell, Supermicro gave us the best performance and least hardware problems for our Dedicated Servers. With Instant Dedicated we also build our own custom dedicated servers, but that is exceptional. Mostly we order fully assembled servers from Supermicro, which are ready to be racked once delivered.
I have made an exception for you this time, to show you how an actual dedicated server is built from the bottom up.
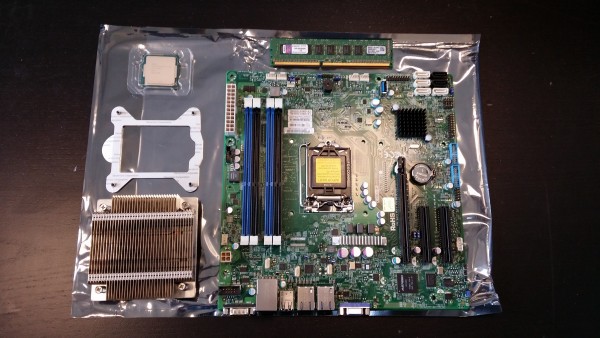
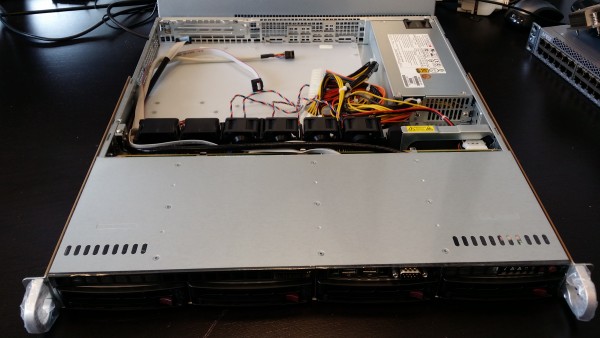
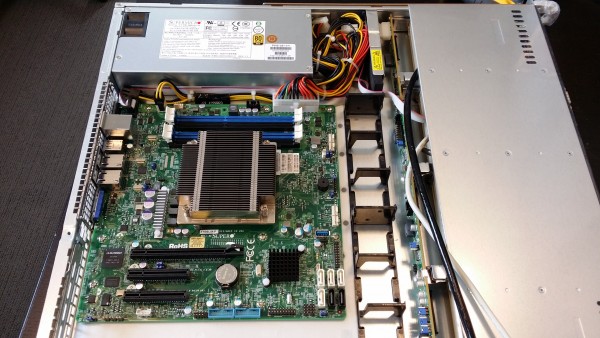
Here you can see the parts needed to put in the server chassis of a dedicated server. It shows the mainboard on the right side, the CPU cooler on the bottom left. Above that you can see the coolers mounting bracket, then on the top right lays the CPU and right above the mainboard you have the RAM (or memory) modules.The next thing we show you is the server chassis. We decided to use the Supermicro chassis with 4x hot-swap drives. It is easy to work with and maintain for adding or replacing harddrives. On the front you can add the hard drives for your dedicated server. Inside the server chassis, the mainboard will be placed. We will show that in more detail in one of the next steps.
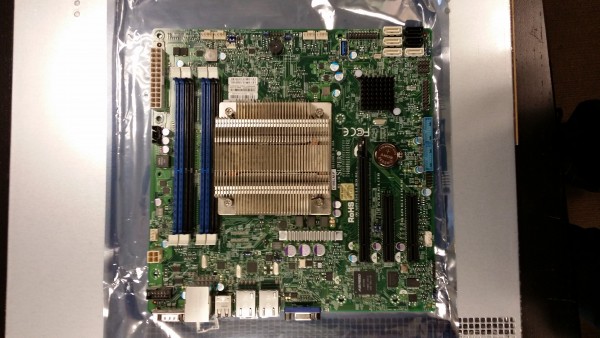
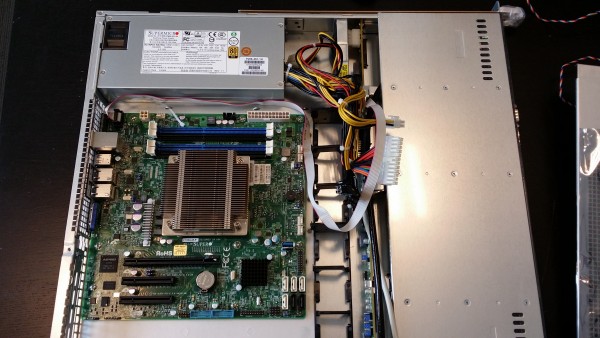
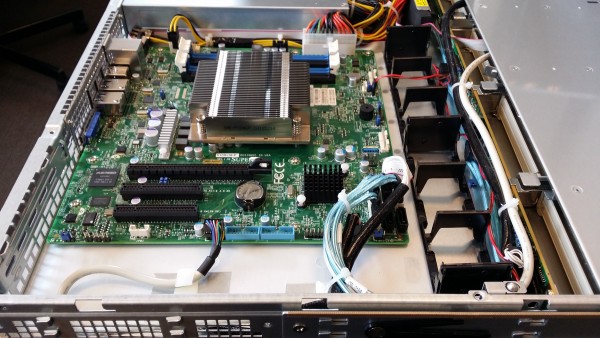
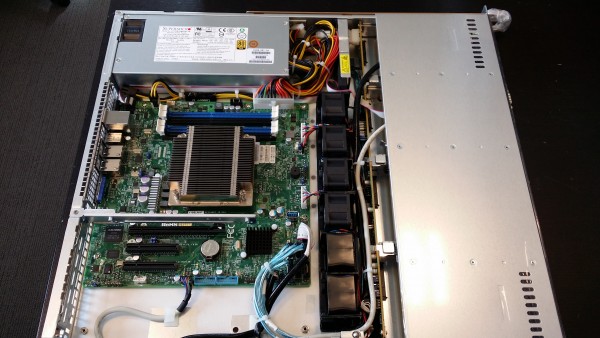
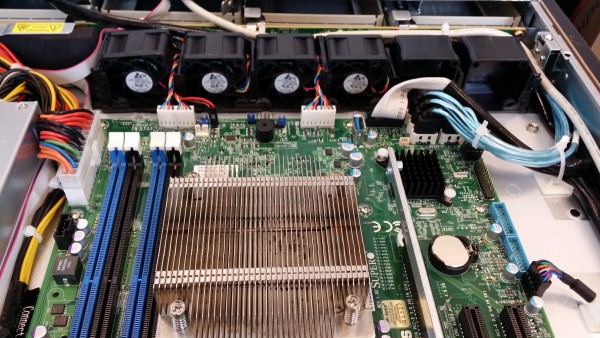
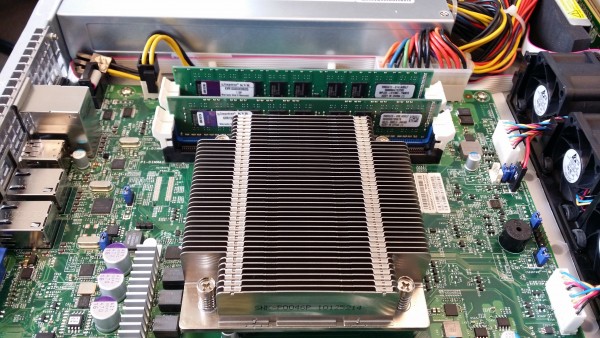
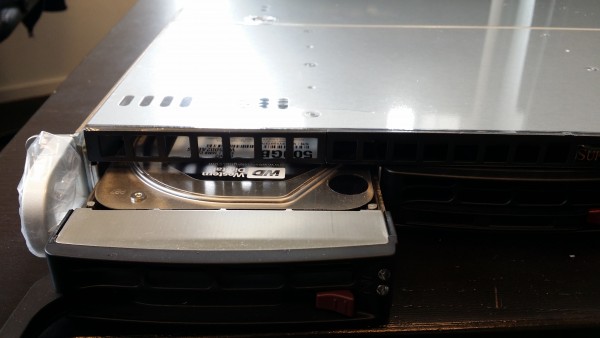
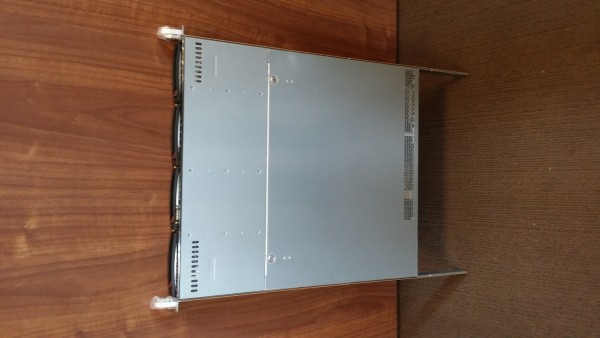
Next the CPU is added in the socket of the mainboard and the cooler bracket is placed on the bottom of the mainboard, right under where the cooler needs to be placed. On this image you can see the cooler is placed and the dedicated server is getting its main components added.Once the CPU is placed on the mainboard, we need to add the mainboard in the dedicated server. As you can see here, the cooling fans on the right side have been removed for easier mounting and preparing the cabling. The mainboard is screwed on the server chassis with small screws so it can be mounted in the dedicated server chassis.We are a fan of tight cabling so also for our servers we take the time for it to make it look nice and tight. The power cables for the mainboard are connected on the top left and irght side. The cabling is done nicely and looks tight doesn’t it? This is how we like it!In the next step we make sure all the cables for the SATA drives for our dedicated server are connected to the mainboard (blue cables on the right bottom). The USB connector in the lower middle of the dedicated server mainboard also gets connected and we make sure the cables are also tightened nicely so the airflow within the server remains of the highest possible quality.The cooling would not be sufficient with all the fans on the right side, so they are added back and connected safely to the mainboard of our dedicated server. On the left side, we also add a mounting rail for supporting a riser card, in case we need to add a RAID controller or 10 Gbit network card to our dedicated server.This is another view so you can see how it looks like from another angle.A server cannot work without its RAM (memory). In this case we added 2x 8 GB modules, so the dedicated server has 16 GB total memory. This dedicated server can support a maximum of 32 GB RAM, because the CPU is an Intel E3-1276 v3, which has support up to 32 GB RAM. There are servers who support a lot more RAM, so those mainboards also look a bit different than this one.Let’s not forget the storage for our dedicated server. In this example we have added a 500 GB WD Enterprise drive. The server supports 4 drives, and apart from the normal SATA 7200 RPM drives, we also have support to add SSD drives in this dedicated server. The mainboard we use here, has support for 6 Gbps disks, so also SSD drives can be utilized at it’s maximum speed.Our dedicated server is now ready to go live on the floor. All we have to do is screw the mounting rail kit in our rack and slide the server in there. Then it’s a matter of minutes, to get your dedicated server online